Here is a picture tutorial on how to do bindings on any quilt.
I like narrow bindings that show about 1/4" inch on the front of the
quilt.
My finishing is a little different but it works and hides your ends.
You can use this same technique with any size binding - simply adjust your measurements when joining the ends and cutting the binding. My finishing is a little different but it works and hides your ends.
TRIMMING YOUR QUILT
1. Once your quilt is quilted you need to trim the edges and corners. I use a large ruler and rotary cutter and trim based on the width of the border from the quilt. I attach a little bit wider border than I want on the finished quilt and trim to make it the desired width.

2. For this quilt, I've lined up the 2" mark on the ruler with the inside edge of the border so I can trim for a 6" border all around.

3. Square up the corners


Here is a peak at the whole quilt (without binding)

MAKE THE BINDING
1. Measure the outside edges(circumference) of your quilt to get the total length you need for binding and then add 10-12".
2. Cut your binding strips. I cut my bindings 2 1/4" wide from the full width of fabric. (Using the full width or bias is a topic for another day!) For this quilt I used the full width (selvedge to selvedge).
 |
| Excuse the crease it's the only picture I have |




TRIMMING THE BINDING (OPTIONAL)
Now the binding measures just a bit over an inch wide and the dog ears are sticking out where your seams are.

1. This is a little extra step.
Trim your folded binding carefully to an inch wide. This removes the dog ears and gives you a very straight, even edge to sew to your quilt.

SEWING YOUR BINDING TO YOUR QUILT
Get ready to add your binding to your quilt. I lay the binding out completely around the quilt to make sure no seams are at the corners of the quilt. If they do, move the binding to avoid this. If it happens it's not the end of the world, just too much bulk.

I wind my batting up to keep it under control

1. Start with your binding raw edges up against the raw edge of the quilt. Leave a tail of 8-10". Pin.

2. Using a walking foot or a sewing machine with an even feed mechanism, start sewing with a 1/4" seam. This will give you a nice tight binding filled with batting.

3. Stitch slowly and carefully along the quilt/binding edge until you are 1/4" from the corner. Stop.
Take a single back stitch.

4. To make a beautiful mitered corner on the binding, take the binding edge and fold it up and away from the quilt. (or out to right and away as the picture shows). See how the binding raw edge is keeping a straight line with the edge of the quilt? That's what you want.

5. Now, fold the binding back down along the quilt edge with the fold even with the edge you just stitched. Pin so it stays until you get it back at the sewing machine.

6. This shows that fold and pin. The seam already stitched is on the right edge. We are going to stitch along the top/left edge next.

7. Go back to the machine and starting at the edge, stitch your 1/4" seam and just keep going.

FINISHING THE BINDING ENDS
Stop stitching when you have 10-12" between the end and your beginning stitches.

You are going to trim your binding ends so they are the exact length needed to sew a diagonal seam.
1. Cut off your lower binding piece (solid green) approximate 6" from the stitch start. Save this piece.
2. Pin the lower binding in place.

3. Now bring the upper binding piece to meet your cut edge and fold it back on itself. See how the right side is pinned and the left is folded back at the cut edge. In other words, the solid lime green is pinned down with a cut edge. The lighter green (upper binding) is folded back on itself with the fold meeting the cut edge of the lower binding.

5. The magic trick: Use the open width of your cut off piece of binding to get an exact measurement for cutting your folded back piece. (Because you are using your actual binding piece this works no matter what size your binding is.)

6. Cutting the binding at exactly the correct place

Now as the bindings overlap they are the exact right size to piece on a diagonal seam and finish the binding

7. To make the seam, carefully open up the bindings (do not twist, I repeat, do not twist).

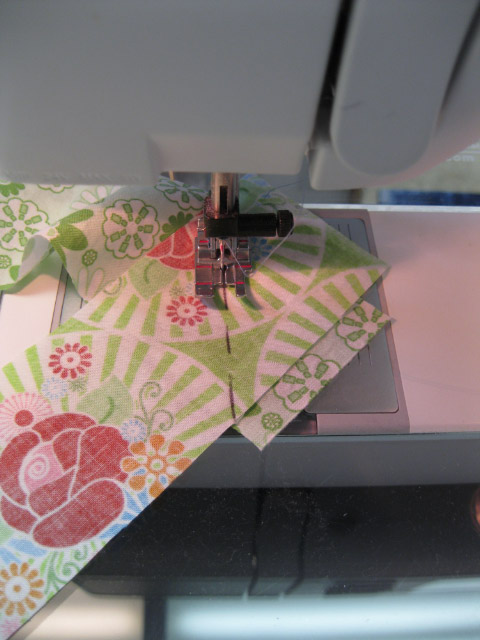
8. Pin them right sides together at a 90 degree angle. I find I need 3 pins to keep it from shifting.

9. Draw a line to show where your seam will be. After a while you won't need to. Think of this as a capital letter A. The legs of the A are your binding pieces and your seam is the cross bar.


12. Once you know it fits, trim the seam, finger press it open and then refold the binding to finish adding it to the quilt.

Almost done. Sew the remaining binding to your quilt edge

PREPARING THE CORNERS
I trim away a bit of the batting and backing at the corners so when I sew the binding down it reduces the bulk.


The next step is to flip this to the back of the quilt and hand stitch it down.
That will be the next tutorial.
I hope this gives you a clear picture of how to do a beautiful binding with mitered corners.


